Waco Rodent Guide
Dead Rat in the Wall: What to Do (and Not Do) in Waco
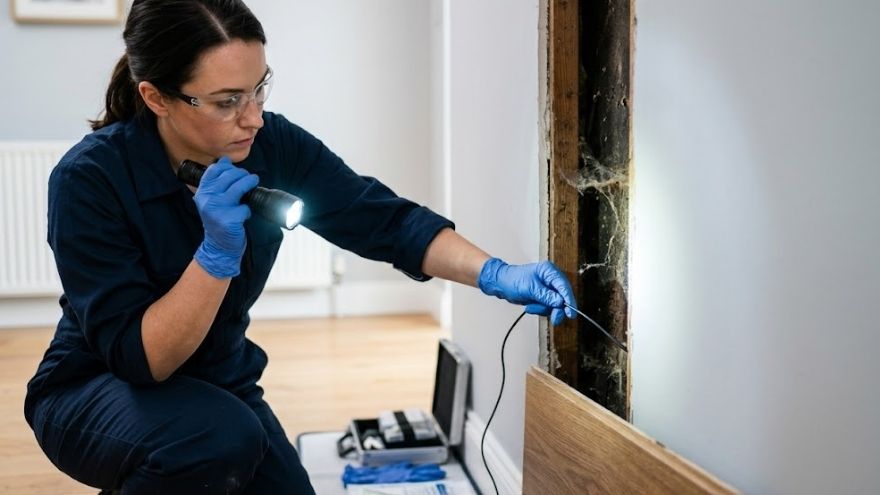
The smell is unmistakable — sweet-to-putrid, coming from somewhere inside a wall or ceiling, getting worse by the day. A dead rodent in a wall cavity is one of the most disruptive rodent problems a Waco homeowner faces, and the instinctive responses to it — air freshener, opening walls randomly, waiting it out — each make the situation measurably worse.
How This Happens: The Three Most Common Causes
Dead rodents in wall cavities in Waco homes arrive through three predictable paths:
Hardware-Store Bait Deployment
This is the most common cause. A homeowner notices rodent activity, buys rodenticide bait blocks from a hardware store, places them in the pantry or garage, and the rodents consume the bait. The bait is effective — the rodent dies. But a rodent that has consumed rodenticide retreats to a safe, enclosed location to die — which is reliably inside a wall cavity, under the sub-floor insulation, or in the attic. The bait doesn't cause the rodent to die in an accessible location; it causes it to die wherever it was when the toxicant reached lethal concentration, which is typically in its harborage site deep within the structure.
This is the primary reason professional treatment for interior rat and mouse activity uses snap traps rather than bait. A snap-trapped rodent dies on the trap in an accessible location and is retrieved immediately. A baited rodent dies in the wall and becomes a dead-rodent odor problem that may require wall access to resolve.
Exclusion With Rodent Still Inside
The second most common cause: a homeowner or contractor seals the primary entry point before confirming that the rodent inside the structure has been removed. The sealed rodent can no longer exit; it dies inside the wall or attic within days of being trapped. This is why professional treatment always follows the sequence: treat and confirm resolution, then exclude. Sealing first is a common and expensive mistake — it solves the entry problem while creating a decomposition problem.
Natural Death in Established Harborage
Rodents that have established long-term nesting sites inside a structure sometimes die there from age, disease, or predation injury. These are less common but create the same wall-cavity odor problem. The distinguishing characteristic is that natural-death cases don't usually coincide with recent bait deployment or exclusion work — the odor appears without any recent treatment activity.
The Odor Timeline — What to Expect
Understanding the timeline helps calibrate the urgency of response:
- Days 1–3: Little or no detectable odor. Decomposition has begun but volatile compound release is minimal. Most people don't know anything has happened.
- Days 3–7: Odor becomes noticeable — musty, then increasingly unpleasant. Homeowners start attributing it to a drain, HVAC issue, or vague "something dead outside." The odor is usually strongest in one room but may be difficult to localize precisely.
- Days 7–14: Peak odor. Maximum volatile compound release from decomposition. This is when most homeowners call us. In Waco's summer heat — attic temperatures of 130–150°F in July and August — this timeline compresses significantly: an attic carcass can reach peak odor in 3–5 days rather than 7–14.
- Days 14–45: Odor begins declining as the carcass desiccates. The smell can linger 2–6 weeks without carcass removal, depending on animal size, ambient temperature, and ventilation. A Norway rat carcass takes longer than a house mouse. An attic carcass in summer resolves faster than a wall-cavity carcass in winter.
- After removal: Odor drops noticeably within hours of extraction. Enzymatic neutralizer applied to the cavity surface eliminates residual odor compounds from the substrate. Most households report 80–90% odor reduction within 24 hours of extraction and full clearance within 72 hours.
Summer urgency: If you're dealing with a dead-rodent odor in July or August, don't wait to see if it resolves. Waco attic temperatures accelerate decomposition dramatically — an attic rat carcass in July creates a more acute odor situation faster than the same carcass in December. Same-day service is available for acute dead-rodent odor calls. Call (254) 343-1352.
What Not to Do
Don't Spray Air Freshener Into Walls or Vents
This is the single most counterproductive response to dead-rodent odor. Air freshener doesn't neutralize decomposition odor compounds — it adds a masking scent on top of them. More critically: we locate wall-cavity carcasses using odor gradient mapping — systematically moving along walls to find the zone of peak odor concentration. Air freshener applied into the space disrupts the gradient and makes location significantly harder, adding time and cost to the extraction process. If you've already applied air freshener, tell us when you call — we'll account for it, but it does complicate localization.
Don't Open Walls Randomly
The instinct to open the wall where the smell seems strongest makes sense, but without systematic gradient mapping first, random wall access is often in the wrong location. Drywall repair after an incorrect access cut adds cost without solving the problem. Locating the carcass first, confirming its position through gradient mapping and probe testing, then making a single targeted access cut — that's the correct sequence.
Don't Assume It Will Resolve on Its Own Within a Few Days
Wall-cavity carcasses without extraction linger 2–6 weeks. The odor does eventually resolve — decomposition completes and the desiccated remains no longer produce significant volatile compounds. But "eventually resolves" in this context means weeks of increasingly unpleasant living conditions, potential blow-fly emergence from the cavity if the carcass is accessible to insects, and ongoing pathogen contamination of the cavity surfaces. Extraction is worth doing regardless of the timeline because it accelerates resolution from weeks to days.
How Professional Localization Works
Our dead-rodent localization process — odor gradient mapping — is systematic rather than intuitive. We move methodically through the affected area, assessing odor strength at each wall section, and narrow the source zone progressively:
- Room-by-room sweep: Identify which room(s) have detectable odor, and which have peak concentration. This narrows the zone from whole-house to specific room.
- Wall-by-wall assessment: Within the target room, assess each wall section for odor strength. The carcass is typically behind the section with peak concentration.
- Height mapping: Odor concentration at different heights along the target wall section helps identify whether the carcass is at floor level (Norway rat ground nesting), mid-wall, or at ceiling level (roof rat traveling overhead through wall cavity).
- Probe testing: In the identified target zone, probe drywall at multiple points for softness (indicating moisture from decomposition), temperature differential (decomposition is exothermic), and audio cues (the hollow vs. solid sound of an obstruction).
- Targeted access: Single access cut at the confirmed location. Carcass removed and double-bagged. Enzymatic neutralizer applied to cavity surfaces.
For attic and crawl-accessible carcasses — the majority of post-bait situations — this process often doesn't require wall access at all. Direct visual inspection from the attic or crawl finds the carcass without any drywall cutting.
What to Tell Us When You Call
A 60-second conversation helps us route efficiently and bring the right materials:
- Which room the smell is strongest in, and which wall or corner it seems to come from
- When you first noticed the odor (helps estimate decomposition stage)
- Whether you recently deployed hardware-store bait, and when
- Whether any recent exclusion work was done on the property
- Whether you've applied any air freshener — and where
Don't worry if you can't precisely localize the source — that's our job. Any information you can provide narrows the search zone and reduces the time on-site.
After Extraction — Preventing the Next One
A dead rodent in the wall is almost always symptomatic of an unresolved infestation or an exclusion error. After extraction, the right next steps are a full property inspection to identify the active infestation that produced the carcass, treatment if activity is confirmed, and systematic entry-point exclusion after treatment resolves. The same inspection is also an opportunity to identify any remaining live rodent activity that the carcass odor distracted from — dead-rodent calls frequently reveal ongoing infestations that the homeowner hadn't noticed.
Related Resources
- Dead Rodent Removal Services
- Rodent Droppings Cleanup
- Rat Control Services
- Emergency Rodent Removal
- Free Rodent Inspection
Same-Day Dead Rodent Extraction — Call Now — Call (254) 343-1352
Free inspection. Same-day for most McLennan County calls before noon. Licensed and insured.
Call (254) 343-1352